
Logic Apps are an interesting new Azure feature to build logically connected flows with sequences of logic happening in logical order. The possibilities are almost endless and you can extend it with own api/logic components if needed. You can use it to do orchestration-like integrations also (consider an http endpoint receiving XML post, schema validation, and some conditional logic to determine if a specific value is something we can route the response differently and maybe send an email as a part of the process). If you can describe it you can implement it.
For my “get started” scenario I would like to write a logic app that looks for comments on twitter regarding this blog and will take different actions based on if some keywords are present of not.
Logic:
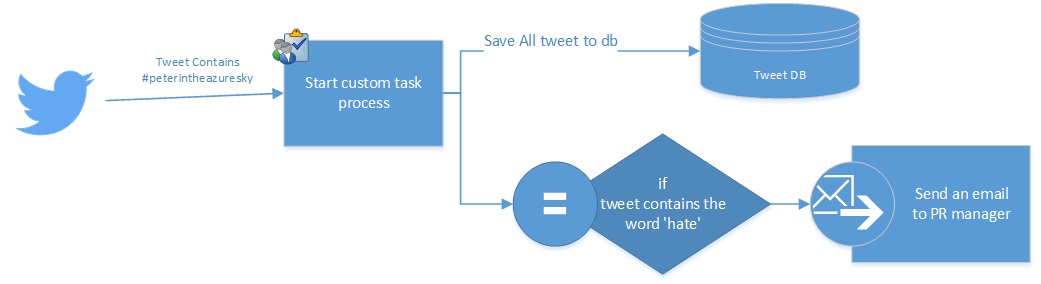
- Monitor Twitter for #peterintheazuresky tag
- Save the tweets to a SQL Azure DB
- Additionally – If the tweet contains the word “hate” it should send an email to me.
Prerequisites:
- Set Up cloud based SMTP service such as send grip (found in marketplace)
Tasks:
- Set up a twitter application
- Create the logic app (twitter, SQL, SMTP api)
- Set up the twitter trigger
- Set up Database logger
- Set up the conditional emailer
Before we start: The logic app designer is not the most stable product in the Azure suite yet so save your progress as you go along. It will likely become better before the preview ends.
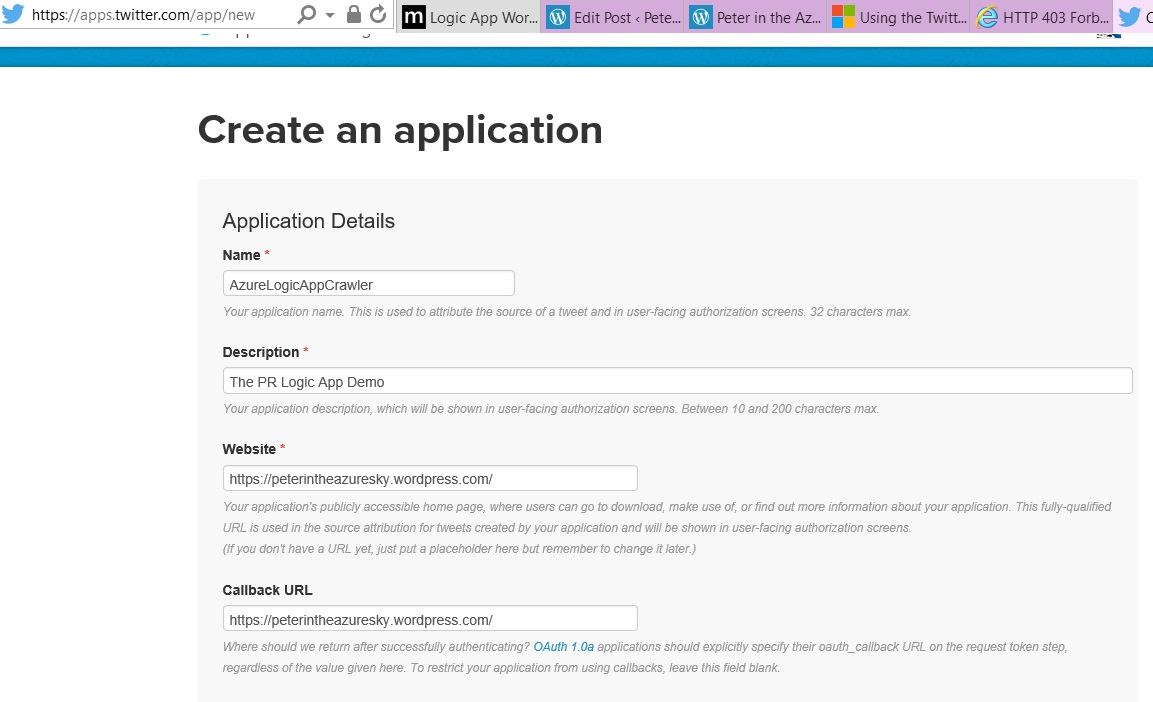
Setup Twitter application
- Goto apps.twitter.com and register your application (note that you should enter a callback, the one on the picture will not work as a callback but you can change it later). Before creating twitter apps you must register your mobile on twitter (log on to twitter, settings, mobile and then follow the instructions).

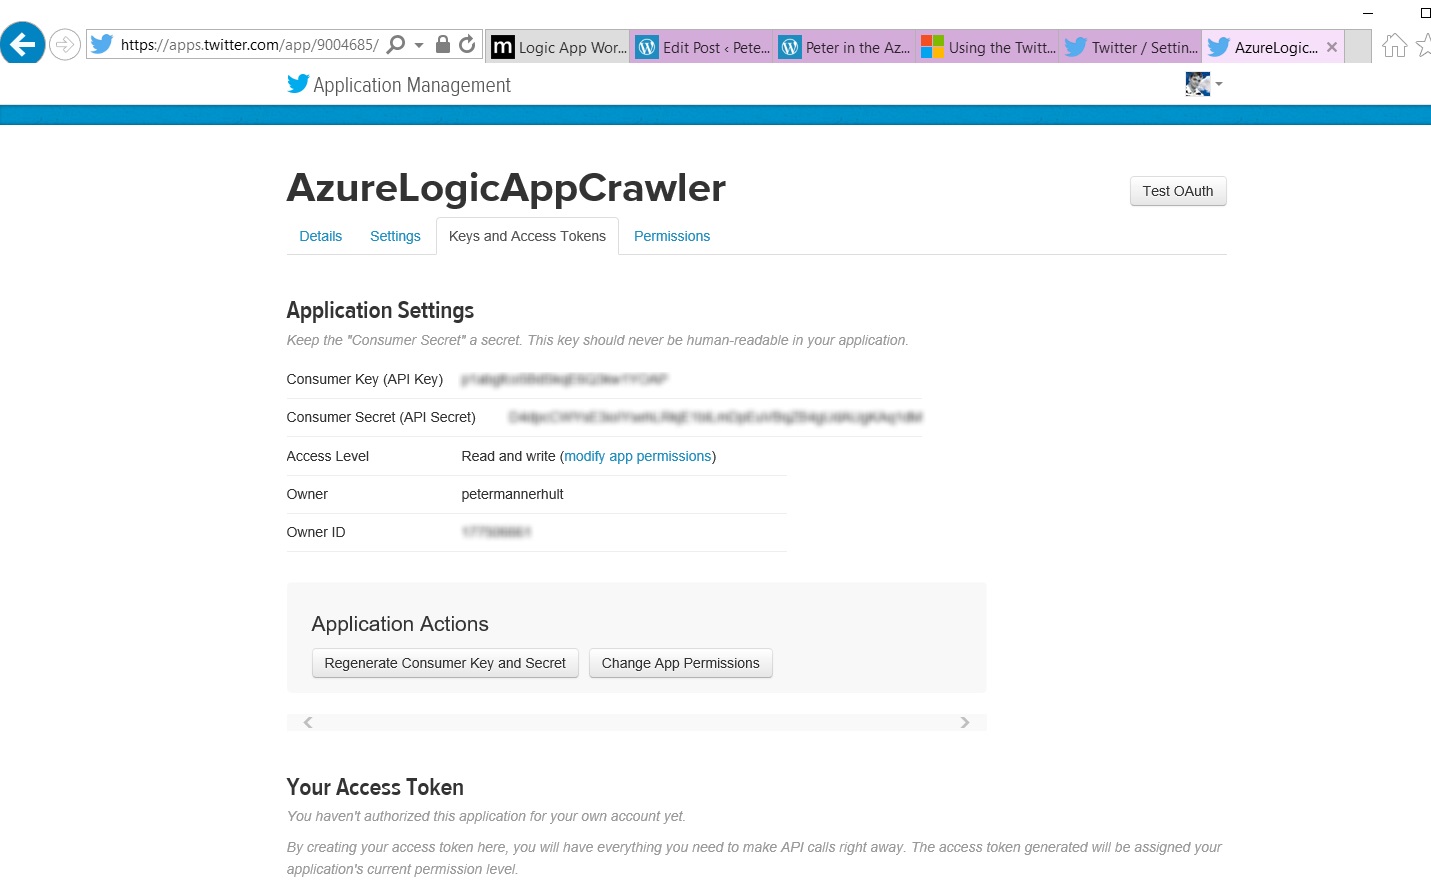
- Go to settings and save note down the Consumer Key and the Consumer Secret (you can always log on again to get them)
Create the logic app
- Go to the preview portal https://portal.azure.com/
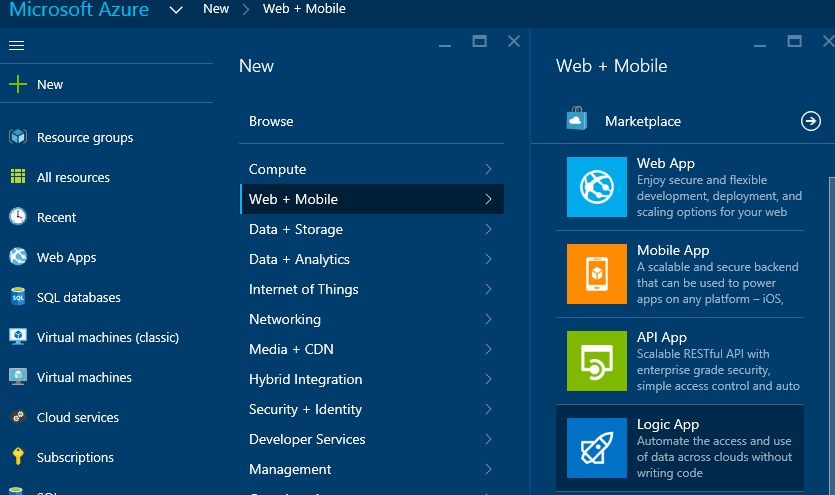
- Create a new Logic App by selecting
- create
- web + mobile
- Logic App

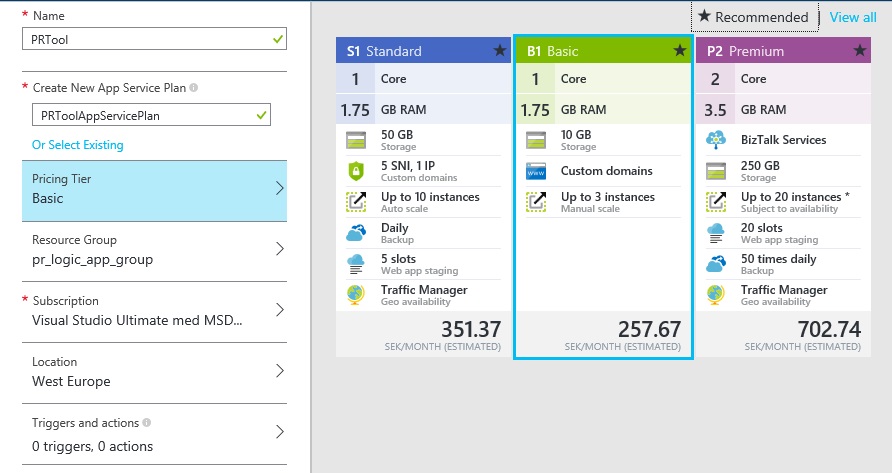
- In the popup enter
- the name of the logic app
- You can select a new service plan or create a new one (I created a new one in this example)
- Select the pricing level for the logic app (for the demo I selected Basic)
- A separate resource group could be nice to have (so I can put all components in it) as well as can deliver role-based security to coworkers for only the PR App.

- Subscription
- Location
Set up the twitter trigger
- Open the logic app, you’ll find it in “All resources” or from the resource group you created.

- Open the Triggers and Actions section by pressing it (single-click)

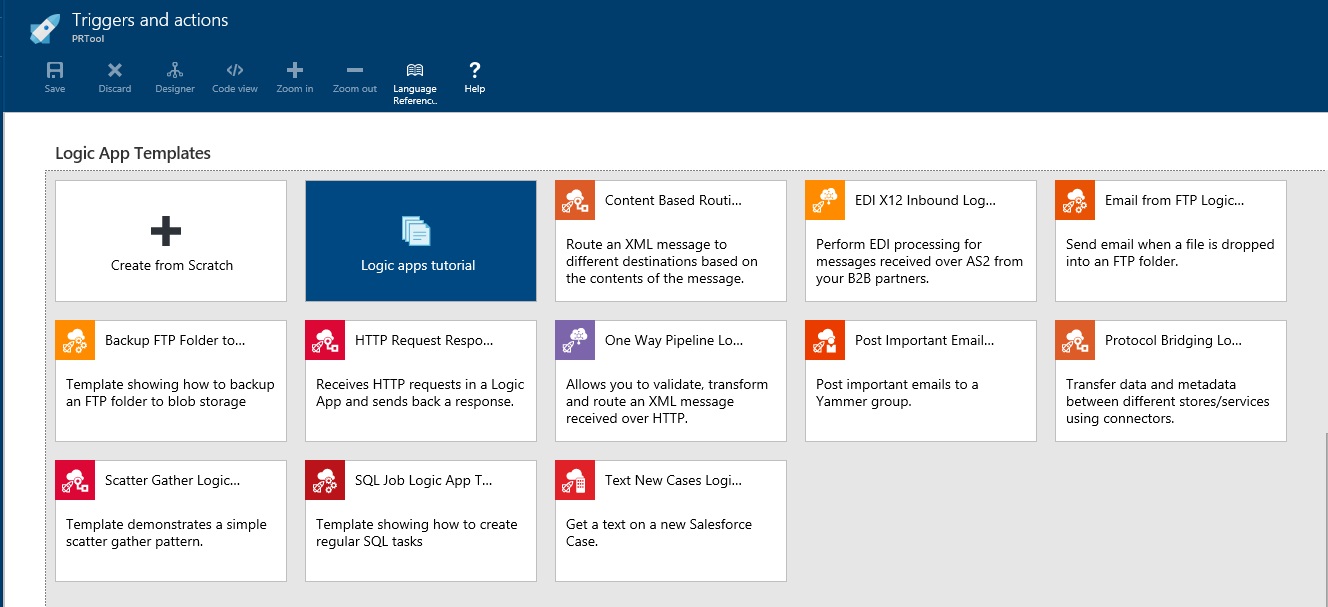
- Select Create from scratch in the template section

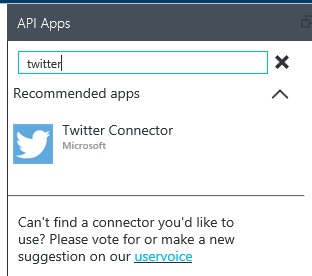
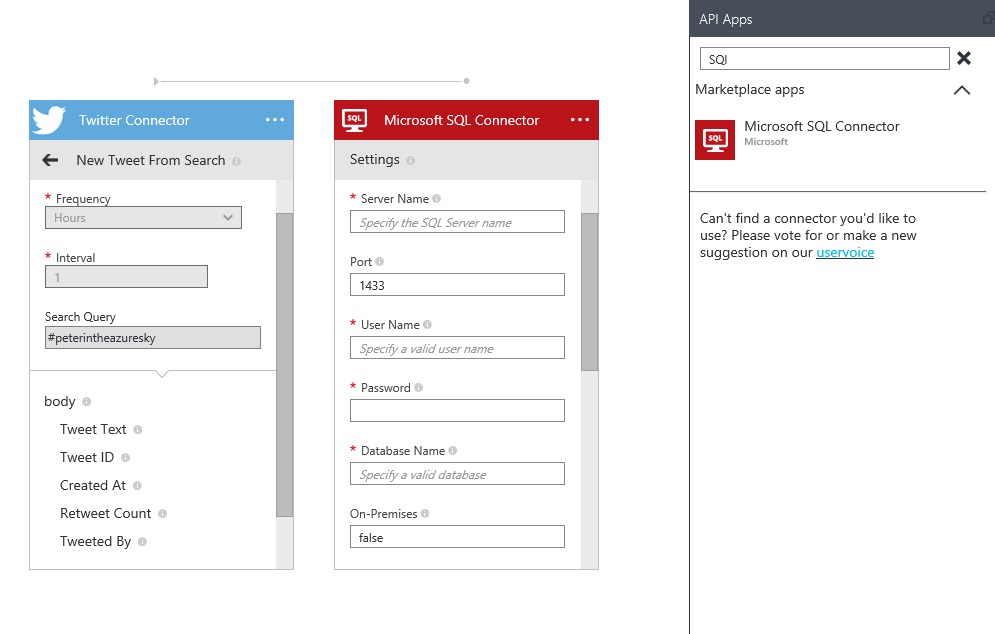
- Search for and add (by single-clicking) the Twitter Connector by Microsoft
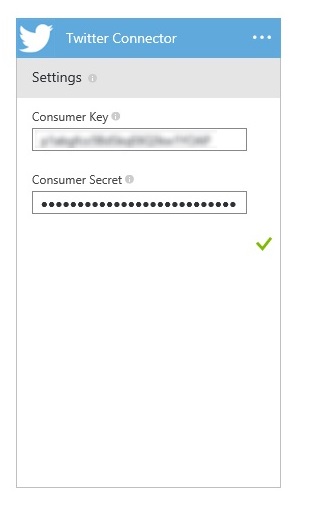
- Enter the consumer key and consumer secret from twitter
- After the provisioning is done you should authorize the app for your twitter account. Press authorize to do this. Note that I forgot to save a screenshot on this so the picture below is from Microsofts page

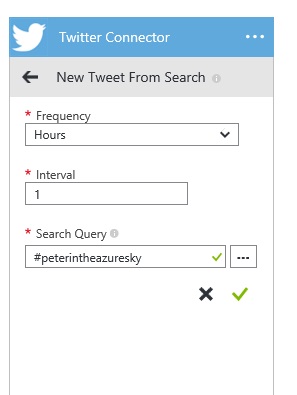
- After this select “New Tweet from search”. Set the frequency to a suitable value and enter the twitter search string in the search query (in my example #peterintheazuresky). Press the green checker when done.

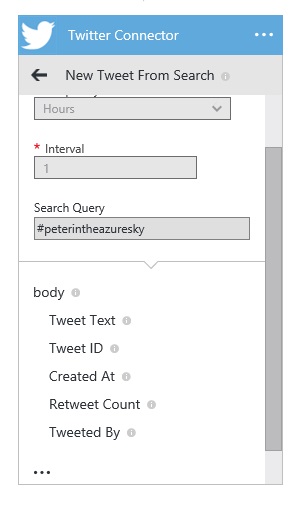
- After this is done you can see the body elements that we are going to save to the database and use as parameters in the email. The twitter trigger is now ready to trigger workflows.


Set up the database logger
To just quickly store all posts into the database I created the following table. Normally I would have configured the TweetDate as a Date but as this tutorial is not about converting data types I store them as the same datatype we get from the twitter api app.
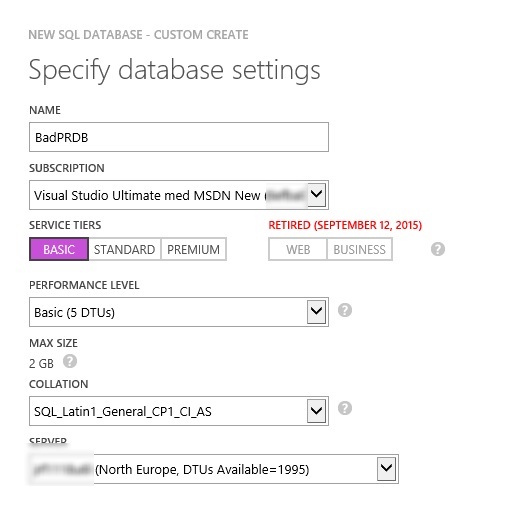
- Create a database (if you don’t have any suitable one already) where you can add the table.
- Create the table
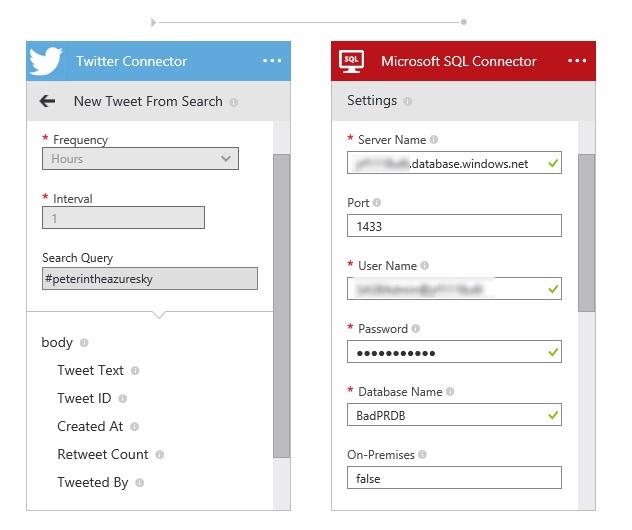
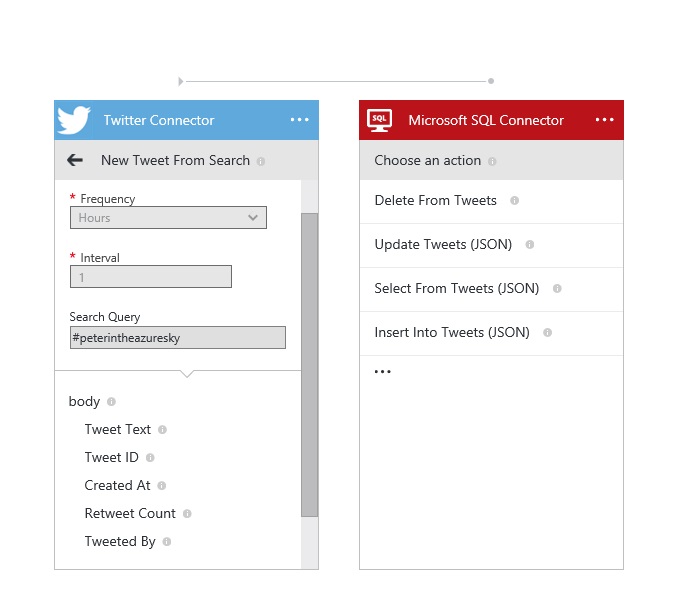
CREATE TABLE Tweets (TweetId nvarchar(100) NOT NULL, TweetDate nvarchar(100) NOT NULL, RetweetCount int NOT NULL DEFAULT(0), TweetedBy nvarchar(100) NOT NULL, TweetText nvarchar(MAX), CONSTRAINT PK_Tweets PRIMARY KEY (TweetId)) - Go back to the Actions and Triggers and search for and add a Microsoft SQL Connector (by single clicking it)

- Enter the credentials to your database
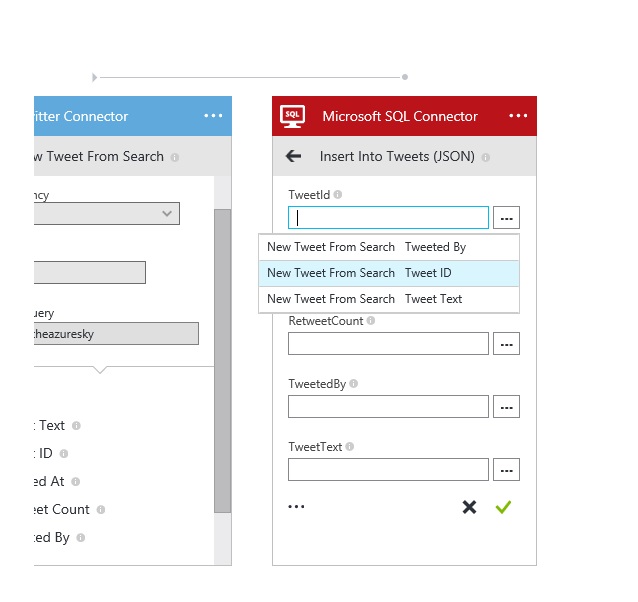
- In our case select Insert Into Tweets (JSON)

- Configure the parameters. When done press the green checker. (in order @{triggers().outputs.body.TweetID} @triggers().outputs.body.Created_At} @triggers().outputs.body.Retweet_Count @{triggers().outputs.body.Tweeted_By} @{triggers().outputs.body.TweetText} )


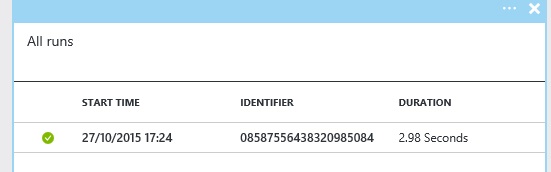
- This is now a good time to test. I entered the tweet below and it ended up in the database.

- You can also see the status in the All runs section in the azure portal (it is also here you would start the error search if it fails).


Set up the conditional emailer
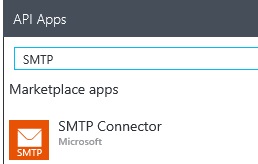
- Add a SMTP Connector to the logic app

- If you don’t have any SMTP connector before – you need to configure it first. I didn’t take any screenshots of this but it is quite intuitive just enter server, ports, account and password, if you get it wrong you can change it later. I used Send Grids Free version from the Azure Marketplace.
- Choose Send Email action. Configure to the below. Note that the Condition is not visible until next step.
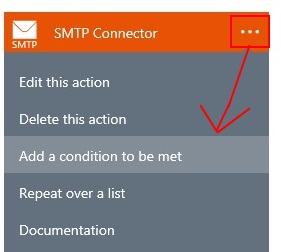
Parameter Value Condition @contains(toUpper(triggers().outputs.body.TweetText),’ HATE ‘) To receiver email address Subject @concat(‘Hate tweet received from : ‘,triggers().outputs.body.Tweeted_By) Body @{triggers().outputs.body.TweetText}Test Add a condition for the email to be sent by pressing the three dots in the top right.
- To add the condition you first need to add a condition field. Du this by pressing the three dots and selecting the “Add a condition to be met”.
- Once the condition is added the SMTP connector will be listed below the SQL connector due to it has a dependency to the Twitter connector and is not a sequence of the SQL Connector. If you look at code view (will display all this as JSON instructions), the “depends on” will not be the SQL connector anymore. Now save the logic app.


Tests – a friendly tweet

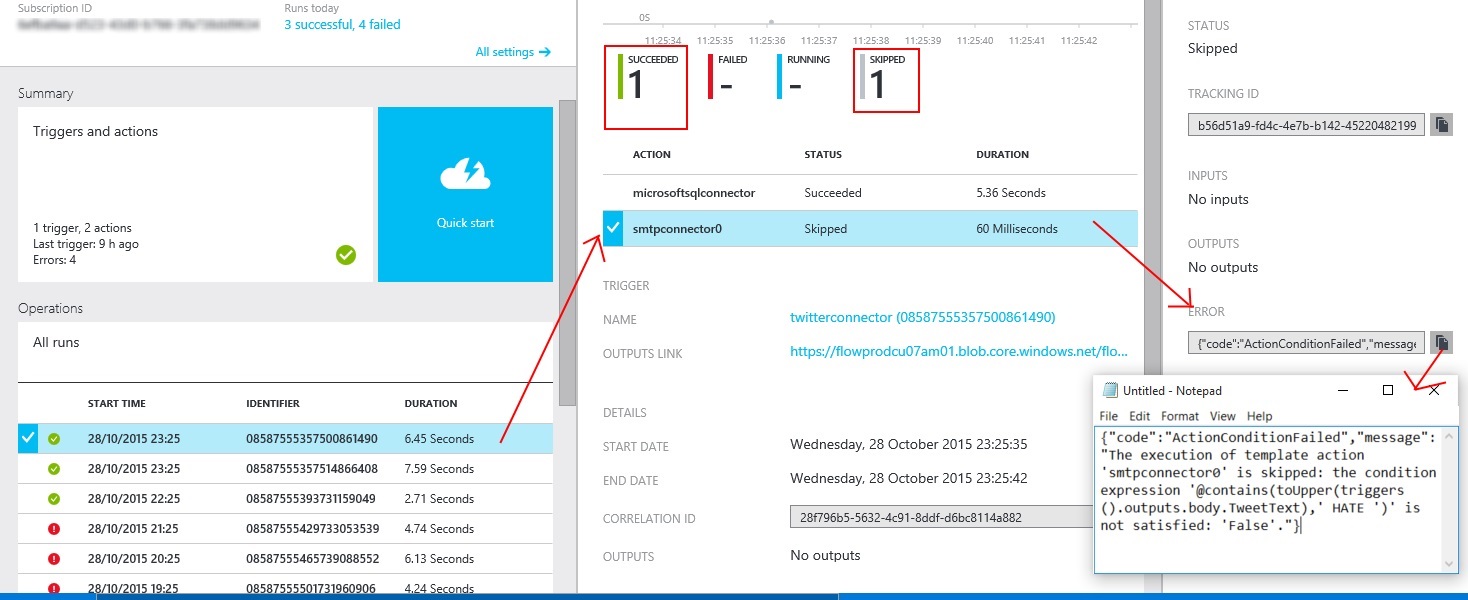
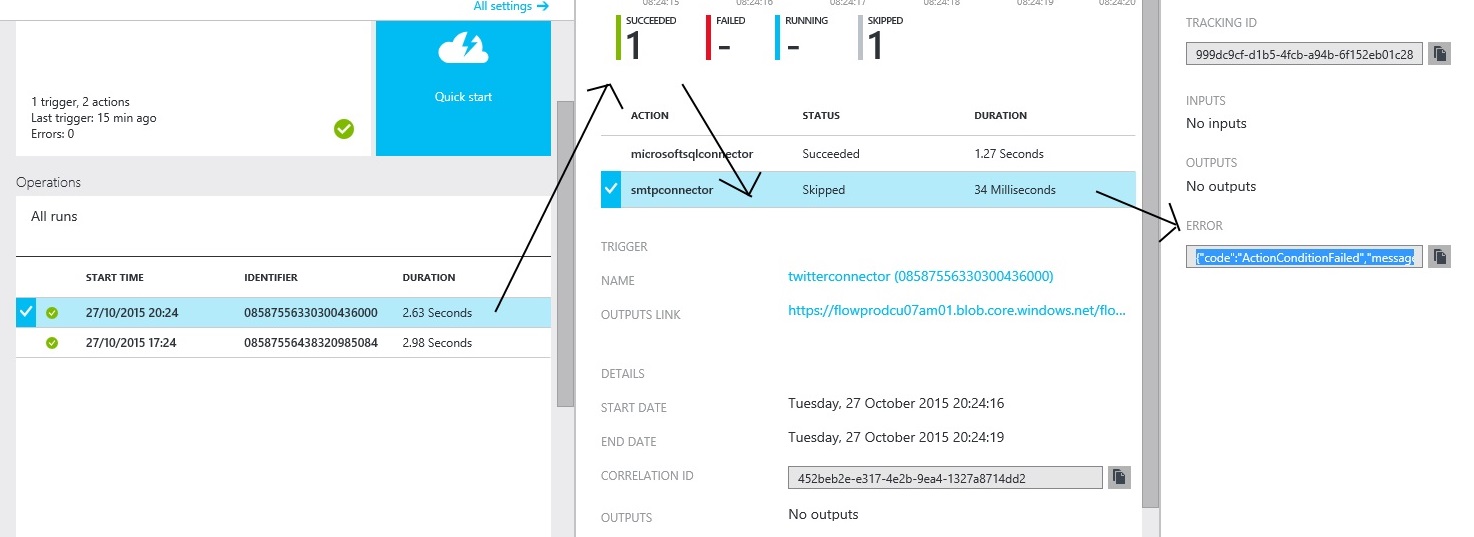
When looking at the results of the run in “All runs”. Select the run in question and you can see that it was green (succeeded) but to the right it flagged one action as succeeded and one as skipped.
If you select the smtp connector you can look at the error test and you will see that the condition was not fulfilled.
And in the db
![]()
Test – a from a hateful person


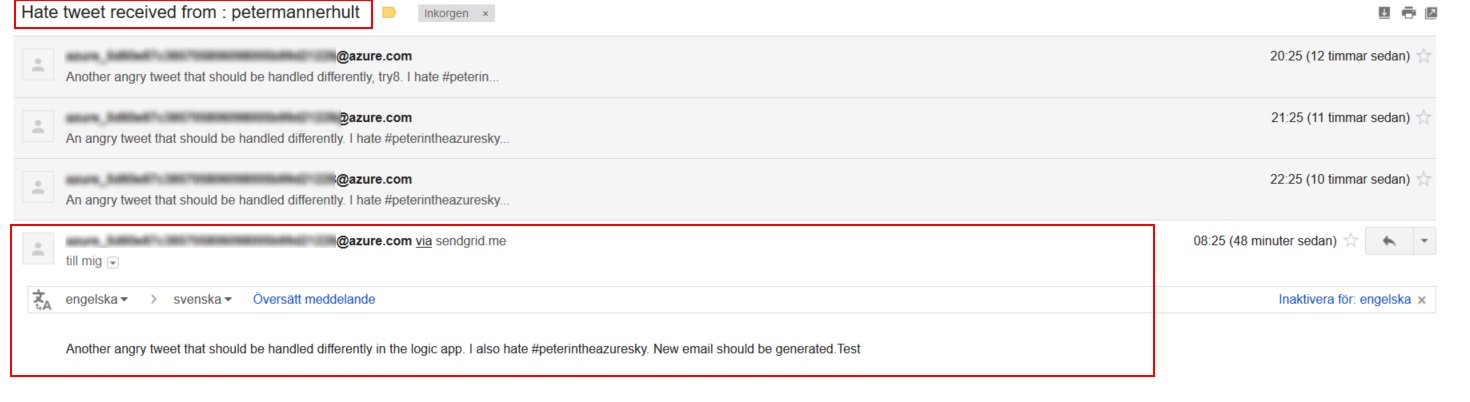
Now we notice that someone full of hate has posted a tweet. Here you’ll notice that the succeeded count is 2. And if i open my email I find the email…
And in the database:
![]()
What did we learn?
- Create a logic app
- Add a twitter trigger but you can use any other trigger instead.
- We used data from the trigger to do an action for all tweets discovered. We saved it to the database
- We used conditions to send only certain hateful emails to the PR responsible with the SMTP connector.
This is just a short fictional sample but consider all the possibilities available. Take actions that adds to queues, start web jobs, create files, integrate with O365, etc, etc…. How much code did we write? – None..
Further reading
Twitter search help: http://twitter.com/search
Logic app definition language: https://msdn.microsoft.com/en-us/library/azure/dn948512.aspx
Help Error search
- Check your parameters to the api apps.
- Open the resource group
- In the summary select the right connector (in some cases select the API App host after that)
- Select “all settings” and would whould be able to check and change the SMTP parameters, twitter secrets or whatever you need
- Check the error outputs in the Runs section in the portal


One thought on “Logic Apps: Building a “bad PR” handler”